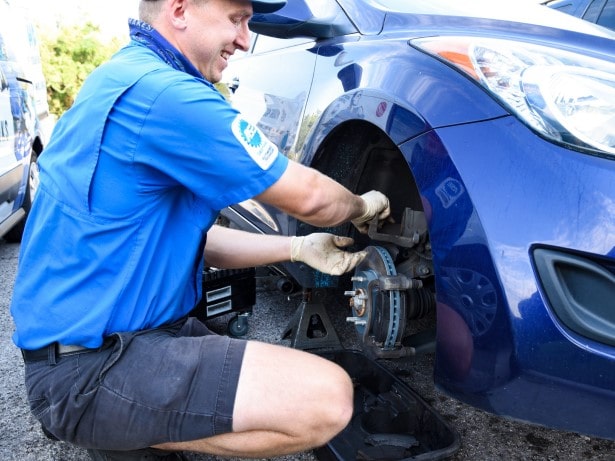
How To Replace Brake Pads and Rotors

March 2, 2023 Topic: How ToTech Talks
Replacing the rotors and brake pads on most vehicles can seem like a daunting task, but with the right tools and some basic knowledge, it can be a manageable DIY project. In this week’s blog, we show you step by, step how to replace the rotors and pads. Brakes To Go does free brake inspections, we are happy to replace to handle any of your brake repair needs. Get a free quote on replacing your brakes!
Tools and Supplies Needed:
Jack and jack stands
Wheel chocks
1/2 impact or breaker bar
3/8 impact or 3/8 ratchet
1/2 ratchet
Hammer
Fluid extractor
Flat head screwdriver
Rotors and brake pads
Brake piston compressor
Caliper hooks or coat hanger
Brake lubricant
Steps to Perform the Brake Job
If you’d like to learn more about our process and pricing, check out Brake Pad Replacement Cost Guide
1. Ensure you have all the necessary tools and supplies to perform the brake job.
2. Lift the vehicle on one of its designated lifting points and place a jack stand under the vehicle’s frame rail. Use wheel chocks behind the rear tires.
3. Remove the front tire to access the vehicle’s rotors, brake pads, and caliper.
4. Inspect the brake components to make sure there is no damage to the caliper, hub, or suspension components that could impede performing a brake job.
5. Remove the caliper slide pin bolts first. Set them to the side and remove the caliper. Hang your caliper by caliper hooks or a coat hanger to keep it out of the way and not hanging by the caliper hose.
6. Compress the front caliper piston using a brake piston compressor. Ensure the piston moves freely back into the caliper and does not have strong resistance.
7. Remove the caliper bracket bolt. Remove the old brake caliper hardware after removing the bracket.
8. After removing the caliper bracket, the rotor can now slide off the hub. Often, the rotor will rust to the hub and need some taps with a hammer to be loosened up and removed.
9. Install the new rotor onto the hub by sliding it over the lug studs. You can temporarily fasten down a lug nut to hold the rotor in place while you install the brake pads and caliper.
10. Slide the old brake caliper bracket back into place over the new rotor and fasten down the bolts to your vehicle’s torque specifications. Install the new hardware in the caliper bracket before installing the new brake pads.
11. Lube up the ears of the brake pad to ensure there is no excessive friction on the brake pad backplate. Now install the pads into the caliper bracket and move on to lubing the caliper bracket slide pins. You do this by removing the pins, and cleaning and lubricating them. After this, install your caliper back onto the bracket and fasten the slide pin bolts to your vehicle’s torque specs.
10. Double-check that all bolts are fastened and that your work has been performed accurately. You can now re-install the wheel and tire and lower the vehicle down to the ground.
13. The final step is to torque the vehicle wheels to the manufacturer’s specification. Double-check the master cylinder has not overflowed and that the fluid is at its specified level.
14. Set the new brake pads to the new rotors to ensure the vehicle stops well. Find an open stretch of road that will allow you to safely stop your vehicle multiple times. Accelerate to 35 MPH and apply moderate brake pressure to reduce your speed to under 5 MPH. Repeat this process 2-3 times, accelerating back to 35 MPH and moderately braking. Next, increase the speed to 50 MPH and strongly brake to 5 MPH. You don’t want to brake strong enough to activate your ABS or lock up the tires. You should be able to reach 5 MPH within a few seconds.
